Flex Fuel Module
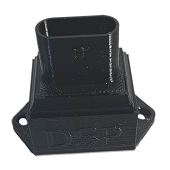
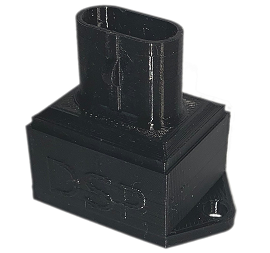
To install our Flex Fuel Emulator Modules follow these 4 easy steps:
-Step 1, disconnect the vehicles battery
-Step 2, unplug the electrical connector from flex fuel sensor. It is also a good idea to clean and inspect your vehicles flex fuel electrical plug. Clean and remove debris to make a good connection. Dielectric grease is a good idea too. (leave the flex fuel sensor in place)
-Step 3, plug the electrical connector to the DSP emulator module and secure to vehicle.
-Step 4, reconnect the battery
Auto Trim Controller
Not sure what type of controller you need?
Hydraulic trim tabs do not usually have any wiring on the trim cylinders themselves, rather they have a metal or plastic line with fluid. They also will have a pump and fluid reservoir usually inside the hull of the boat. The lines or tubes from the pump will connect to the trim cylinders in the back of the boat. Example below.
Hydraulic trim tabs do not usually have any wiring on the trim cylinders themselves, rather they have a metal or plastic line with fluid. They also will have a pump and fluid reservoir usually inside the hull of the boat. The lines or tubes from the pump will connect to the trim cylinders in the back of the boat. Example below.
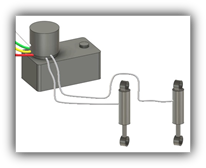
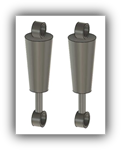
Electric trim tabs do not use any type of pump, they contain a motor built in them. They generally have 2 wires coming from them. They are often larger on the top of the cylinder where it contains the motor. Example below.
Fuel Cut Eliminator
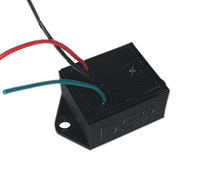
To install our Fuel Cut Eliminatior Module follow these steps:
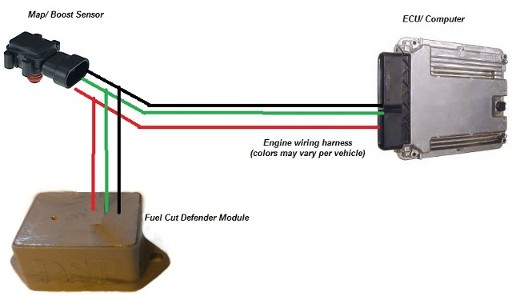
Splice into the existing wiring harness between the Map/Boost sensor and the ECU.
Reminder: Red is 5v+, Black is GND - , Green is SIGNAL OUT to ecu.
Make sure it is a good weather tight connection!
To adjust: Simply turn the screw clockwise to allow more boost, counterclockwise for less boost.
Splice into the existing wiring harness between the Map/Boost sensor and the ECU.
Reminder: Red is 5v+, Black is GND - , Green is SIGNAL OUT to ecu.
Make sure it is a good weather tight connection!
To adjust: Simply turn the screw clockwise to allow more boost, counterclockwise for less boost.
Delay Timer

To install our Time on Delay Module follow these steps:
Connect the wiring below to your project.
Reminder: Red(+12v), Black (Ground or negative), Green (Relay Common), Orange (Relay N.O.), Yellow (Relay N.C.)
Connect the wiring below to your project.
Reminder: Red(+12v), Black (Ground or negative), Green (Relay Common), Orange (Relay N.O.), Yellow (Relay N.C.)
F.A.Qs
~Installation Frequently Asked Questions~
Q: Where are most flex fuel sensors located?
A: On most trucks they are located under the vehicle on a crossmemeber near the transmission. On cars they are usually in the engine bay near the firewall. An easy way to find this is to follow the fuel lines from the tank. They will be between the tank and the engine. There you will see the 3 pin connector. Leave the sensor in place with the fuel lines connected and only plug in the connector to the DSP Flex Fuel Emulator Module. Most look like the image below.
Q: Can I run Ethanol gas or E-85 after installing a DSP Flex Fuel Emulator Module?
A: It is not recommended to run any Ethanol/ Gas mix over 15%. The computer will not know to to run correctly with any mixture over 15%.
Q: Do I need to disconnect my battery before installation on any DSP module?
A: Yes, you should always disconnect your battery when doing any electrical installation. If you do not do this there are chances of shorting out a device or getting a check engine light.
Q: What is the best way to mount any of the DSP modules?
A: You can either use a self tapping screw or a cable tie to mount to a frame rail or bracket. The two tab holes are provided to help mount the device.
Q: The plastic on the bottom of the module is rounded. Is that bad?
A: No, It is perfectly normal. This is due to the strong yet flexible plastic and the air sealed inside. Changes in temperature can cause the air pressure to push out slightly. No need for concern, everything is working correctly and sealed properly.
Q: The plastic on the module looks like it has a black crack or line on the bottom. Is it broken?
A: No, when the plastic dye is added, sometimes it doesn't mix perfectly. These black lines are just darker lines in the plastic. The plastic is not broken or damaged in any way.
Q: After installing my DSP Flex Fuel Emulator my check engine light came back on. What could cause that?
A: Some computers take a little time to check the issue has been fixed. This could take a few miles, up to an hour of drive time. It also could be due to low battery voltage. The Emulator requires 12 volts to opperate properly. If the vehicle has a low voltage issue this will cause the light to come back on. Please follow the troubleshooting steps below.
~Troubleshooting~
1- Check battery voltage. If you have less than 12 volts and under 10 volts cranking, Replace the battery and this should solve your problem.
2- Check the wiring connector. Sometimes there is corrosion, or some other non conductive source on the pins in the connector that can prevent the signal to get to the computer.
3- Check the fuses under the hood. Some vehicles have a common power that multiple sensors use.
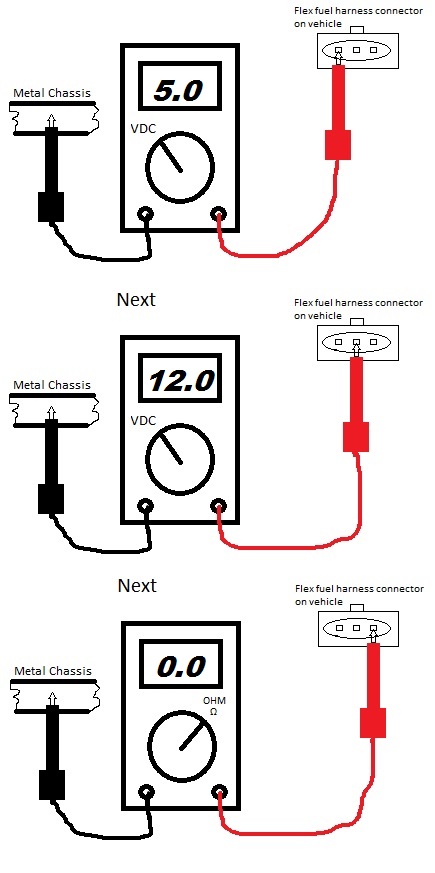
4- Check the wiring from the computer to the connector. You can disconnect the plug from the computer and from the sensor then check the continuity on the wiring. You also can check the wiring using a volt meter. Your connector should have +5v, +12 and lastly a good ground source (0 OHMS to chassis ground). The image below is how to check these voltages with the vehicles key in ON position.
It is also a good idea to wiggle all wiring harnesses and connectors to test if there is a bad connection or break in the wires.
5- Replace the computer. If your original flex fuel sensor shorts out or causes a voltage spike, it could have damaged the computer internally. A new flex fuel module or sensor will not fix a bad computer.
** If your CEL light comes back on or the module stops working properly please disconnect the battery, unplug the module, re-secure connection and then reconnect the battery. If it continues to come back frequently, please contact us**
